
Never throw another can away again.
LOL!!
You will need:
4 ounce Ortega chili can (You can use any can size but the cutters I am using are for the 4 ounce size can) to find the right circle cutters, put a cutter inside the lid top to see which cutter will work and then use the nest size up for lid top.
Cernit Clay in
Orange
Light Green
Gold
Caramel
Opaque white
Black
Poppy red
 Yellow
 Large block of Biscuit
1/2" Oval Kemper cutter
3/16" round Kemper cutter
1 1/8" round cutter
2" round cutter
2 1/2" round cutter
2 3/4" round cutter
Clay slicing blade
Knitting needle or bic stic pen
I mix all of my colors equally with the same amount of biscuit.
Condition to one color.


Roll out orange on the thickest setting.
Cut out 2 circles that fit in the top and the bottom of the can and the lid.
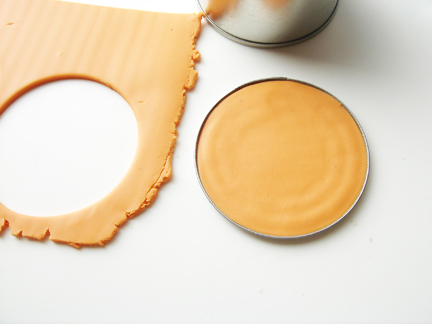

Place on top of the lid.
Press into the clay already in the lid and fold over the edge just slightly.

Make sure it will wrap around the whole can. I forgot to measure it. ;-D

Cover the sides and the bottom edge.

Wrap around can and over leading edge to make a slight mark so you know where to cut the strip.
Press out air as you wrap around.

Match edges together and smooth with finger or tool.

Hold blade at an angle and trim around the top of the can.


I use a 1/8" metal rod to make indents in the side of the can like the indents in the side of the pumpkin.
I make 3 close together for registrations marks.

Like so. Some of the lines do not have to go from the top to the bottom and can be just marks on the top side or the bottom side.


The middle of the can.
You can see my three lines for registration already marked on the top of the lid.

All the top side marks continued on the top of the lid to the center of the lid.
Place you blade in to the side of the lid and gently pop off the can.


Put a Little dip in there.

Now flatten out the bottom.

I made five little fingers in the bottom all of varying lengths.


I start in the dips between the little fingers and go up the side of the stem.
Stay tuned for part 2...
Sooo cute! Nice idea for Halloween and for my daughther's next birthday party. She wants a Monster-High party... Please check my blog: http://ehfeitocomamor.blogspot.com/ (ehfeitocomamor - in english, it would be something like itsmadewithlove).
ReplyDeleteMuchas gracias por el tutorial, muy interesante. Besos
ReplyDeleteI wish I could come over and watch you make one of these! They are so cute! I love the ones you made for your camp store. xox!! Pam
ReplyDeleteOh Marie! This is so awesome! I just love pumpkins! Thanks for sharing this!!!! Happy weekend to you and yours!
ReplyDeleteSo much work! I think you should sell them in your shop ;o)
ReplyDeleteYesterday I came here to leave a comment but I started rambling and pretty soon my screen refreshed automatically and I lost everything I wanted to say. So I am going to do this in installments.
ReplyDeleteSister Marie, I have not left a comment for a long time but I have been secretly admiring your handiwork. I think it is wonderful that you entered the contest to win your own tin can. I would have too! Hehehehe.
ReplyDeleteHow is my dearest friend Madi? Is she driving yet? Hahahaha!
ReplyDeleteYou are a wonderful teacher. I love the little tins, even the naked ones. So happy to see you. Have a wonderful weekend and I know you are going to whip up and incredible Halloween piece! Tsup!!!
ReplyDelete