Showing posts with label Cernit. Show all posts

Monday, April 16, 2018

Clay and Paint (Cernit) company sends me tutorials to share. I have been a little overwhelmed with my life and learning another thing just seemed too much for me at the time!
I got in to my blogs and everything had drastically changed in my blog world. All the things that I had gotten so good at had completely changed.
My brain just said no!
Well I am trying again, if you are willing to bear with me, I will get this stuff again!
Anyway here I go!
Enjoy!
Marie


Wednesday, June 14, 2017

I wanted to share with you some of the Candle shades that my friend Maria Jam Brown has been making lately.
They are made from Cernit polymer clay and alcohol inks and mica powders. You can find all of these products in my store the Clay Factory. www.clayfactory.net
I think these are amazing in their execution and drama, so simple yet SO wonderful.
Lesson here for me too, complex and complicated is not always better.
Thank you for this Maria and thank you for letting me share these beauties.
Enjoy the expression, joy, and drive of something well done!
These are stunning!
This is excerpt from the Facebook post I made in my store pages.

This candle holder is made by Northwest Artist and a cartographer at IRL in Seattle, Washington, Maria Jam Brown. I love the quality of nature Maria Jam Brown has captured in the Polymer clay with ink colored translucent Cernit.
From Maria's post,
"Today's project: translucent Cernit and mica gold mixed with alcohol inks to create an amber, gold, and rosy quartz candle holder. It looks a bit like it was carved from Himalayan salt! (I had to test it out with a tea light before giving it as a gift tomorrow. )"
Here is Maria's on line studio with pieces she makes, tutorials, and info at her page at Blonde Crow Studio.
http://www.blondecrowstudio.com
# Cernit
Here is the very first candle shade she made.


Here are the new Candle shades she has been making! I love the colors and the effect she is getting and how about those trees?


Tuesday, June 6, 2017

This candle holder is made by Northwest Artist and a cartographer at IRL in Seattle, Washington, Maria Jam Brown. I love the quality of nature Maria Jam Brown has captured in the Polymer clay with ink colored translucent Cernit.
From Maria's post,
"Today's project: translucent Cernit and mica gold mixed with alcohol inks to create an amber, gold, and rosy quartz candle holder. It looks a bit like it was carved from Himalayan salt! (I had to test it out with a tea light before giving it as a gift tomorrow. ☺)"

Here is Maria's on line studio with pieces she makes, tutorials, and info at her page at Blonde Crow Studio.
http://www.blondecrowstudio.com


Friday, June 2, 2017

The Earrings I made from the last tutorial post

These are the earrings I made from the the last tutorial post- the little translucent headpin flowers. 
This is the link
https://mariesegal.blogspot.com/2017/05/little-translucent-head-pin-flowers-you.html

I love the way these turned out. You can find them in my Etsy store
https://www.etsy.com/listing/520751614/spring-flowers-dangle-earring-with?ref=shop_home_active_1


Thursday, May 25, 2017

Little translucent head pin flowers
You will need:
2-3" headpins gold or silver
Cernit Translucent clay- I used Emerald, Violet, Turquoise, Ruby, and Amber
Square cutters- 3/16", 5/8", and 3/4"
Scotch Quick dry adhesive
Cernit can be purchased at 
http://www.clayfactory.net

#Cernit
#mariesegal

Little Head pin flowers

Put a tiny drop of the glue on the head of the pin and let it dry. The bottle has been re-labeled I will place a picture of the new bottle below


This is the new labeled bottle

Condition and roll out clay on the 3rd or 4th thickest setting in your pasta machine. Using the 3/4" square cutter, cut out as many squares of the color as you want to make flowers. I used 2" Skinner blends for my flowers. Emerald for the leaf squares which is the 5/8" square. And all the centers will be the new 3/16" square cutters that we are now carrying. Push the head pin through the center of the flower square.
You can find all of these square cutters at any of our etsy stores ask for special order.
Or at http://www.clayfactory.net/kempertools/pages/pattern-cutters-kemper-tools.htm
On this page you will find links to all of our shops and my blog
http://www.mariesegal.com/Shops.html


Add a 3/16" Amber colored square to the top of the head pin with the dried glue dot and press the flower square and the center square around the head pin top.
Here is the link to all of our shops.
http://www.mariesegal.com/Shops.html


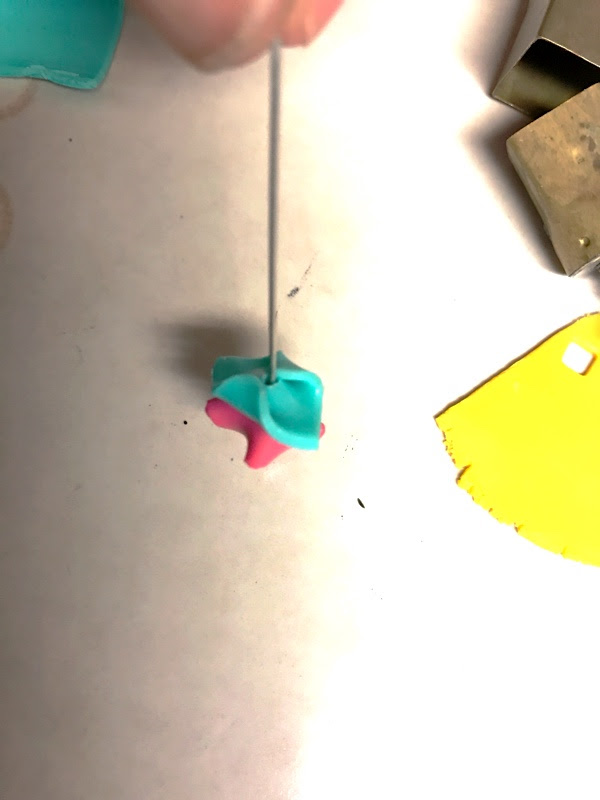
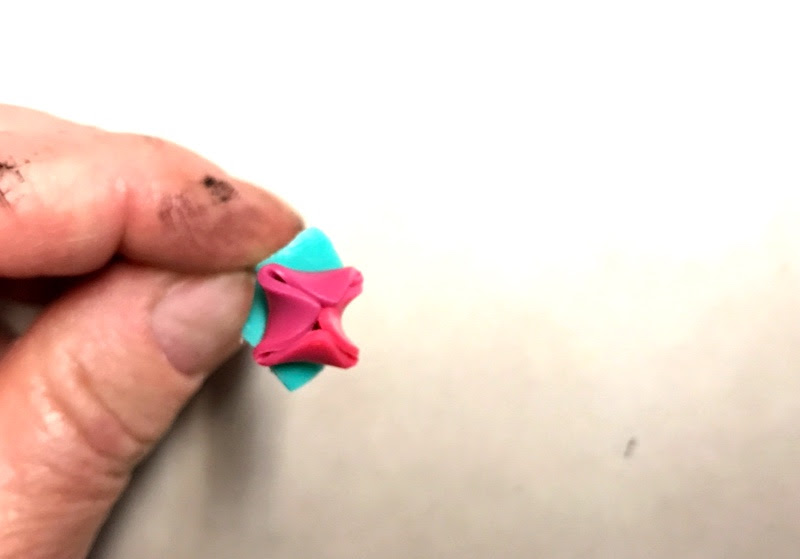
Pull all the corners together in the center by doing the left and the right side corners first and then top bottom corners. Tack the lightly together with out smashing together.

Slide the 5/8" Emerald leaf square on to the end of the head pin and slide up against the flower bud. Tack the leaf and the bud together in the centers of each the leaf square and the center of the bud bottom.


Like so.


Curl under two opposite corners to the center of the leaf square and tack to the clay lightly with out smashing the curl.

Curled leaves have rolled look like a curl of chocolate.


Here is the completed bud. Lay on a piece of card sock in your tray and bake in a oven at 275 degrees Fahrenheit for 35 minutes. I also tint the whole tray with aluminum foil. I bake in a regular electric oven for 50 minutes. I plunge them into an ice water bath hot out of the oven until they are cool. The translucent will be more translucent if quenched in ice water.
Have fun!
#Cernit

Wednesday, May 3, 2017

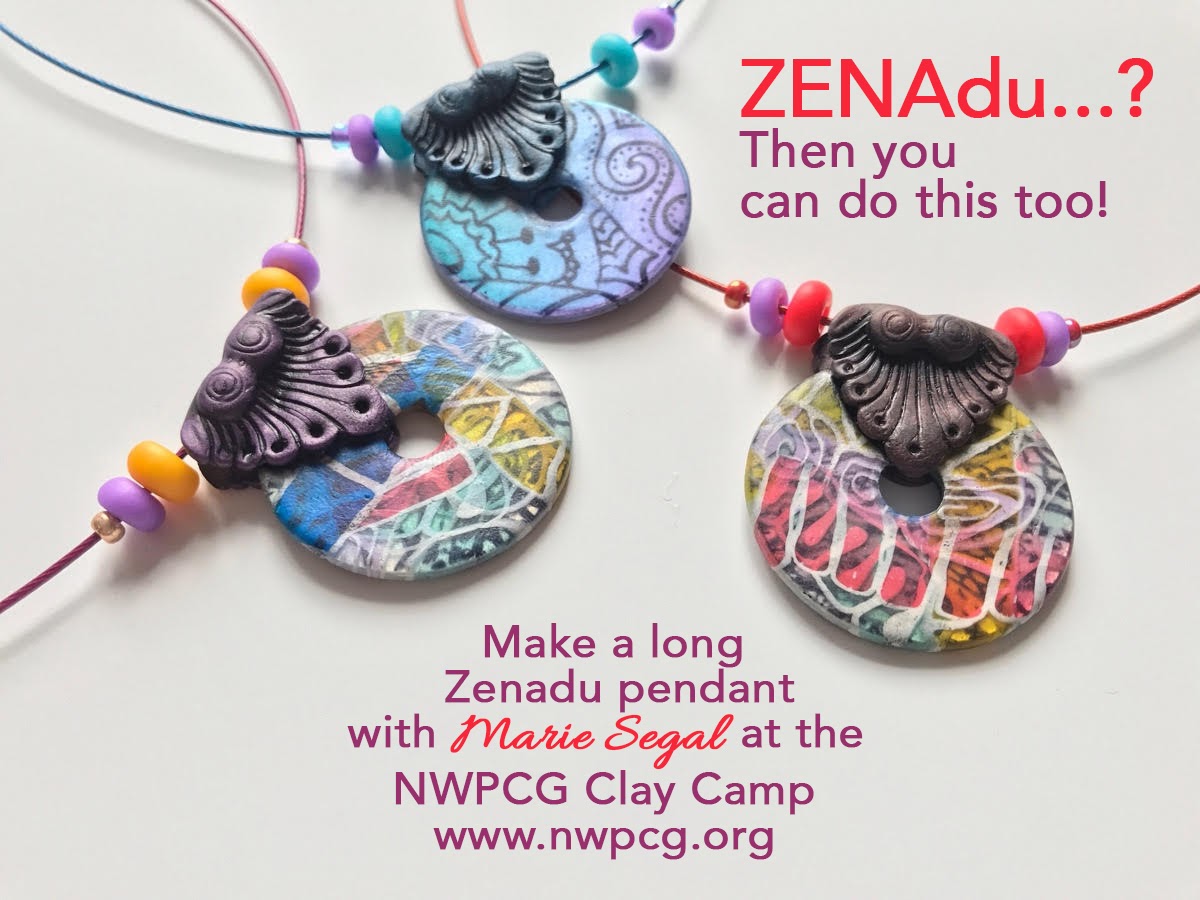
ZENadu Pendant at Clay Camp!

Long Zenadu Pendant 
I just wanted to let you know that if you are taking the ZENADU Pendant class from me at Clay Camp in the great NorthWest of America, put on by the NWPCG you will also learn how to make this happen there small Pendant with the same technique.
So make the Zenadu Pendant and you can do this Pendant also.
Classes are still open, come for one, come for all of them, or come for a day or two, or the whole damn time. You will not regret it.
www.NWPCG.org
Clay for my classes is being donated by me and my on line store www.clayfactory.net

Short Zenadu Pendant


Saturday, April 22, 2017

Northwest Polymer clay Guild Clay Camp in May

Happy Earth day!
Have a great weekend!

This is one of the classes I will be teaching at clay camp in Gold Bar, Washington, in the middle of May.
It is at Camp Huston, a beautiful Place in a northwest forest of green trees, rocks, and a gorgeous mountain, will watch over us at all our meals. It is one of the most relaxing and truly beautiful places I have been in my life.
Hiking trails all over the place, a great group of people, good food, fun and games, laughter, and creative frenzy.
 Wicked Little Bowls is one of my half day classes.

 You can find  he info at http://www.nwpolymerclayguild.org/?page_id=1460

Saturday, September 3, 2016

ToolTime with Marie #1- WS tool


I carry a ton of tools at the Clay Factory, I thought it might be nice to show you a few of them.
This first one on the list is mini wire tool, used for Sgrafitto, the wiki definition for the word, give it a click.
Or for carving out small areas, like around the eyes when sculpting. I am also playing with tool for texturing.
This is the way I learned sgraffito on Ceramics back in the early 70's.
This is a lovely little wire tool with many applications and many possibilities.
 
I am going to show you "A" way to use it with Polymer clay-Cernit, Pinata inks, and the WS tool, called a wire stylus by the manufacturer.
Here is the link the the picture of it.
http://www.clayfactory.net/kempertools/pages/WS.htm
Here is how much it costs from my Clay Factory
http://www.clayfactory.net/kempertools/Page9.htm 
Scroll down the page a little 

You will need:
WS tool
Pinata Inks
Porcelain White Cernit
Pasta machine or stainless roller
Ruler
LED night light w/clear acrylic shade
sharp blade
glue- e6000 or scotch quick drying paper glue or Ultimate glue from Crafter's Pick


Step 1. Condition and roll out your clay on the thickest setting in your pasta machine.
Step 2. Make the sheet if clay 2 3/4" tall by 2" wide.

Step 3. Ink it, I am going to draw a basic Mountain scene for the project, please feel free to go nuts. Draw in the blue line for the sky. I am using Baja Blue Pinata.

Step 4. Blur the line with a cotton swab. I waited between pictures awhile, and the ink had dried partially


Step 5. Add more ink and blur. Fill the sky


Step 6. Using now, Lime green, I fill in the mountain.


Step 7. I used the Baja blue side of the cotton swab to blend the mountain and gave some variation to the green color of ink


Step 8. Once I make the sheets I let them dry. it only takes a hour or so to be completely dry or in my area right now about 10 minutes. The ink will also dry out the surface a bit and make the scratches easier and cleaner while carving.


Step 10. Start carving, the tip on mine bend down a little I like this. Cut in to the clay lightly with the wire and in one stroke with out turning the head  of the tool pull the tool towards you at the same level.


Step 11. Start carve in the outline of the mountain. It is harder to turn the head of the tool as you go so go slow and steady and not too deep. With practice you will be amazing. If you work on cardboard you can turn the cardboard while you are carving. The wire tip needs or works best when it parallel


The more detail you put in the better it looks. You  zentanglers are going to love this.


Step 12. Finish off the picture, it is a practice one anyway, Practice!


Step 13. You will have little bits of porcelain clay colored by inks so... to leave nothing to waste. Roll a ball of clay porcelain or another color in the little bits to clean them up and to use them up.


Step 14. Picked up.


Step 15. Roll in to the ball.


Step16. Flatten a little, make a hole in it, and cure in the oven at 275 degrees for 30 minutes.


Step 16. Bake your piece on the curve of the jar. I made this from one of my glass vitamin jars and I pressed the jar in to 1/2" logs of clay. They will stick so you can bake this piece with out gluing it.
Once the legs or logs on the bottom side of the jar are baked I glue with Scotch paper glue and let dry. That way I can re-bake this and use it over and over again.


Use the glues mentioned above to glue the Clay piece to the clear acrylic shade of the NightLight.
Do not block the Sensor with the clay sheet.

This night light is done with a mandala rubber stamp stamped right in to the porcelain colored clay.
The stamp is from Studio G, and distributed from Hampton Art Inc. Another great source of stamps for Polymer clay is Rubber Stamp Plantation in Honolulu Hawaii. Tell Deb, Marie sent you!
After stamping and carving while the clay is raw drop on colors of ink and spread, wipe off extra ink with clean up solution added paper towel. Do not scrub with paper towel, but wipe off gently!


As beautiful hanging out during the day!
 As it is lit up at night!

Have a great weekend, it is a holiday in the US, drive careful and be nice while you are out and about, you may give another being a reason to live another day by your miracle of kindness.