Showing posts with label cernit polymer clay. Show all posts

Friday, June 2, 2017

The Earrings I made from the last tutorial post

These are the earrings I made from the the last tutorial post- the little translucent headpin flowers. 
This is the link
https://mariesegal.blogspot.com/2017/05/little-translucent-head-pin-flowers-you.html

I love the way these turned out. You can find them in my Etsy store
https://www.etsy.com/listing/520751614/spring-flowers-dangle-earring-with?ref=shop_home_active_1


Saturday, September 17, 2016

Cernit red translucent fixes

There have been a couple of changes in the red/ruby translucent.
I am going to show you how I usually do with things that could be potentially be a real pain when manufacturing for myself.
As in yarn dye lots, there are always differences and then there is the added changes in products for using in polymer clay being in the safety and availability ever changing field!
So I usually go with the flow on the changes coming forward nowadays and hack the color. Or as close as I can get!
 OK, the skull in the middle is the older red/ruby, the one on the right is the new red/ruby, and the one on the left is the red/ruby I made from the new red and the Yellow/Amber translucent color.


They are all slightly different: the one on the right, the new one, is very Carmine-y and bluer, It is lovely in its own way. I thought this may be a better mixing red, it is but I will get to that later. Notice the darker skull at the bottom right, that is the purple I got from 3 part  Ruby and 1 part Sapphire, it is a gorgeous purple and rich, if you added another part of the new ruby, you will a bight intense purple which most people know as violet.
One advantage of this new red is pleasing purples and oranges from it's mixing abilities.

The one in the middle is the oldest red/ruby color package that I had, it is definitely Warmer in color.
The one on the right is the color I mixed up the first time: it is 3 parts Ruby and 1/2 part Amber, it is not warn enough to match or get close to the middle colored skull. But is it good and you can barely see the difference, so it probably needs maybe 1/4 part more. I can tell that from these sheets below.  

The red on the left is the mixed color I made after using the new red 3 parts and the amber 1 whole part now to  see where to go next with the color. I believe that the paragraph above is the answer with 3/4 part amber to 3 parts Ruby.


This is the purple I mixed up with the new Ruby Color as per my last shipment.

The purple on the right is the one I mixed up from the formula 3 parts ruby and 1 part sapphire. The one on the left is the purple that we have available to us in the Cernit palette, Now these work fabulous together and can be the other color you need in your purple shades that you use.


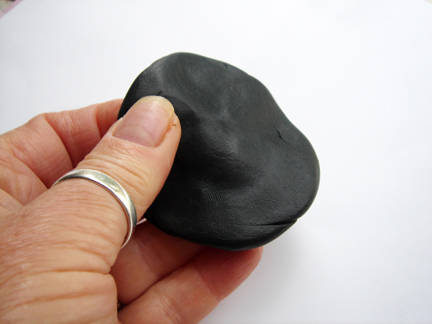
The photo here on your right with one piece of purple clay I am holding. Isn't it gorgeous? It is also yummy hit you in the face face color, that I love so much. But when you use it with light behind it, oh my goodness. This is wonderful!


Here is the whole palette of all the colors mixed and otherwise and this a great bunch of colors that shout come play with me!
All of these Cernit translucent sheets are rolled out on the thinnest setting in my machine. My setting go from the thickest being 0 and the thinnest being a 9.
I am quite pleased at how Cernit does this so very well.
Just roll down one thickness at a time to get sheets like this! Oh and do not try when the clay has just been made, it is too smooshy for that!


Need some incredible translucent clay to play with?
www.clayfactory.net/
http://clayfactory.net/cernit/cernit-polymer-clay-translucent-colors.html

Tuesday, August 14, 2012

Blast from the past- 1st installment BPCanes

It is way too hot to take pictures. I was thinking that some of my content in the beginning of my blogging adventure was pretty cool, so sort of like summer re-runs on TV, I am going to re-post some of these babies that I really like.
Silence on a radio, no picture and sound on a TV, and no words on a blog are always a little disconcerting.
May your summer be cool.
May your drinks be cooler,
and may your heart be content.
Blessings all over all ya all!!

Just a note: Bead Space is no longer a viable link, but bead patterns are readily available all over the web!
Click on the title header below to take you to the full blog post!!

Extruder Canes with Bead Patterns as a guide
I put up the color mixing chart yesterday for this project!


Millefiori is the glass technique of bundling or layering colored rods of glass together to form images and then cutting the cross section of the bundled or layered glass to get a little tile of an image. These colored rods of glass are called canes. I have seen this technique duplicated in many mediums, ceramic, candy, food, and polymer clay, and it can sometimes seem almost impossible to achieve, but if you start with basic design, bulls eye canes, open spirals and checkerboards just to name a few, you can combine those to make more intricate pictures or images, called advanced caning. Anytime two or more simple patterns are combined it becomes advanced. I have found a way to make intricate canes that is so easy to do, yet gives the impression of intricacy and complication. Bead patterns and a Makin’s Clay extruder are great for attempting this.

Friday, December 23, 2011

Happy Holidays, all of them. My gift to you- Focal button- diy

Happy Holidays to one and all, that means all of the holidays. No matter what you celebrate, you are important to me. Blessings all over you and yours and may the new year be very kind to you.
2012, how can it get any better than that? :-O

This is my gift to you.

Thank you for following, your kind comments and support, your friendships, and a reason to keep going everyday!

Large focal buttons can be used on handmade coats, purses, bags, and scarves. Or they can be put on factory manufactured things to give them a little individual style all their own.
Easy to make and great for adding a little flair and uniqueness to a special gift.
This is also very basic instruction. You can use a clay machine if you want and if you do, use the thickest setting for everything.

You will need:
Black Cernit
Two accent colors of Cernit, I used turquoise and poppy red
Cocktail straw
Clay blade-SB
Makin's clay cutters-M36002 set of 3 squares
Pearl-ex powder-658, I used Aztec Gold
Makin's Texture sheet set- 38003 I used the "weave" one
Button mold, I made my own from old German glass buttons
Rolling pin or dowel
Ball point pen


Condition black clay and flatten in to a pancake shape.


Roll with dowel until about 1/8"thick.

Roll clay on to texture sheet.


Use largest square cutter and cut out square.


With a little of the Aztec gold powder from the lid on your finger rub the gold powder in to the four corners of the black textured square. Leaving the center of the square free of powders. Put the powder only on the top of the black square and keep it away from the sides of the square too, we are going to place a twisted coil around the square.
Wash your hands to remove excess powder.


Condition and roll out turquoise clay to about 1/8" thick.


Cut out medium square from set of cutters.


Put turquoise square on top of the black textured square off-center from the black square.
Condition some of the poppy red clay and roll in to a coil about 1/8" in diameter and then do the same thing with some of the turquoise clay.


  Twist the two colors together.


Roll the colors together on the work surface.
Roll down to about 1/8" in diameter.


Place the twisted rolled out coil around the large black square.


Roll out a smaller coil of the poppy red, about 1/8" in diameter, and place around the smaller turquoise square.


Make a button from your button mold or some other decorative center.


Powder the top of the molded button.
Place powder on your finger from out of the lid.
Rub your finger around a couple of times to smooth out the lumps and then brush on to the clay lightly and in circles.
You can also roll the whole ball in powder. Make it a little bigger to begin with , press into the mold and then cut off the back so it is flat with the mold.
This insures that there is fresh un-powdered clay on the back to attach to the turquoise square.


Press gently on to the turquoise square.


You could leave the button like this, but I am going to add a couple more things.


Roll 4, 1/8" or smaller balls of black clay and place in the corners of the turquoise square.


With a ball point pen tip make a little mark in each of the black balls.


With one end of the cocktail straw cut a hole on the right side of the button top.
Turn the straw over and use the other side of the straw to cut another hole on the left side of the button.
I have cut my button holes so the button will sit and be sewn on diagonally.


Like so.
Bake for 30 minutes in a pre-heated 275 degree F oven, shut off the oven, and let cool till you can touch it, in the oven.


Happy Holidays Ya'll, all  of them!!


Friday, November 11, 2011

Let's talk Turkey!

Gobble, Gobble!!

I thought it would be fun to have a tutorial on a simple turkey.
This could be made in to a magnet or pin.

You will need:

Caramel Cernit
Opaque White Cernit
Poppy red Cernit just a pinch
Orange Cernit
Black Cernit just a pinch
Clay Machine
Clay Slicing Blade
Bamboo skewer
Sun like cutter from Flowers and leaves Makin's clay cutter set
5/16" Kemper Kutter flower
3/4" Kemper Kutter Round


Condition Opaque White clay and roll out in the clay machine on the 4th thickest setting. You can roll through the machine several times to get a nice smooth sheet.

Cut out one of the sun "like" shaped cutters and lay on work surface.


Condition and roll out the caramel on the 3rd thickest setting. Cut out one of the sun "Like" shapes.
Place the caramel one on top of the white one and off set it so the whites points show between the Caramel points.


Flatten the two together with the palm of your hand, preferably the rounded cup of your palm.


Cut out two circles of Caramel out of the round 3/4" cutter. Put them together and roll into a ball. Then using your forefinger roll on one side of the ball and rolling in to a bowling pin shape.


Like so!


With the back of the clay blade (careful now!) Make a mark about 1/8" to 1/4" down from the top of the small end of clay bowling pin shape.


Bend the tip over at the mark.


Place the bowling pin caramel shapeon the  two cut out sun "like" shapes and press the thicker end to the shapes like you see in the picture.

Make marks with the end of your blade around the turkey body where the indents are around the outside of the sun points in the brown flower/sun are. This step is optional, but does add a little more to the turkey.


Roll out the orange clay on the 2nd thickest setting and cut out two of the 5/16" flower.
Push them out of the cutter and pinch two of the petals of the flower together.


Place the flowers that are now feet, with the pinched petals in the back,under the thick flattened end of the bowling pin caramel shape.


Cut out another flower shape.
We are just going to use this for the size, so roll that flower in to a little ball.


Roll on one side of the ball  to shape it in to a shape it in to a little teardrop.


Just like this.
Place this little teardrop thick end first on the end of the bowling pin caramel top of the bowling pin.
You will able to see it in the picture after I put the eyes on.


Roll out a very small coil of black and cut off a tiny, tiny section.


Cut two of them and roll them into balls.

They a will be very small, like a 1/16".


Here is the placement of eyes and beak.


Now we are going to make the pieces for the waddle. Roll out a small coil of the poppy red.
Cut off  two short pieces and one long one.


Roll them all in to balls and then roll them in to elongated teardrops.


Place one of the two small ones on top of the head.
Then place the other.


You can see where the red pieces go, here.


Looking a little like a turkey now.


Poke two holes in the beak, so he can breathe.


With the side of the flower cutter mark the chest with marks for feathers.


Like this.


 Use the flowers cutter and cut out four flowers  out of the caramel sheet that is rolled out on the3rd thickest setting.


Put two together and roll in to a ball.
Do that with the other two.


Roll those into teardrops.


Flatten those teardrops.


With the back of the blade mark both wings on the tips.


Now mark the wings with the flower cutter and mark horizontal marks on the tips too.


Place the wings on the thick end of the body.

Your turkey is done.