Mrs. B is extending the giveaway for the bat and pumpkin cupcake necklace I made giveaway until the 1st of November so if you still want a chance you can hop on over there and add your name to the bunch.
http://www.confessionsofapagansoccermom.com/2011/10/giveaway-from-marie-segals-art-from-my.html
You can see the necklace in the picture below the cat picture.
Thank you for your votes on the
Fave Crafts Blog Hop. I did not win, but I feel great about bringing a ton of new people and unique votes to their web page and I could not have done it with out all of you. Blessings all over all of you.
Spooky fish skeleton that is not just for Halloween.
At least that is what I think anyway.
I love this cane.
I hope you have fun making it too.
You will need:
Black Cernit
Opaque White Cernit
Porcelain Cernit
Biscuit Cernit
Clay slicing blade
Clay machine
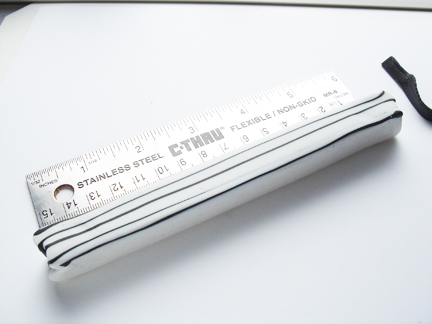
Ruler if you wish
I mixed the black clay with Biscuit and the white clay with porcelain in equal parts
Condition and roll out the black in to a sheet on the thickest setting in your clay machine.
I cut five sheets in black 2 1/8" by 1 1/2".
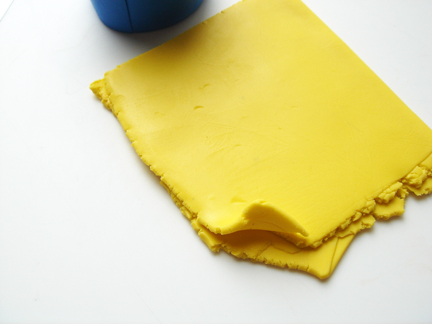
Roll the white clay out on the 3rd thickest setting.
We will cut down the white sheets to size but these are a great size to start with.
Cut out 5 sheets of the opaque white 2 1/8" by 1 1/2". You can use a black sheet as a template.
Cut off 1/8" from each side of the long side of the white sheet.
Lay a black sheet down and place this white sheet in the very middle of it.
Take another sheet of black the same size as the ones above and rolled out on the 3rd thickest setting like the white sheets above and cut off 1/8" from the long side.
Place the black strips on the side of the white sheet on both sides.
It will be like there is a whole sheet that is 2 1/8" by 1 1/2".
Add one of the 5 black sheets that you cut in the beginning to the stack above.
It will look like this from the side.
Cut off a little strip that is a bit bigger than the first ones ( 1/4") you cut. Do this from both sides of the sheet.
Place in the middle of the sheet of black that you just placed on the stack.
Cut off strips the same size as the ones you just cut off of the white sheet out of the black clay rolled out on the third thickest setting.
It will look like this.
Add another one of the first black sheets that were cut.
Cut off a strip on each side of one of the white sheets that you cut before, these strips will be a little bit bigger than the last strips.
Add the white sheet that is left to the stack in the middle.
Add strips of black clay rolled out on the 3rd thickest setting to the sides of the white sheet.
Then add another one of the first black sheets that you cut in the beginning.
Cut a bigger strip from each side of the next sheet of white.
Add the white sheet to the stack in the middle of the stack.
Add black strips to the sides of the white sheet.
Add one of the original cut sheets of black to the stack.
You can guess what happens with the next white sheet right? I knew you could.
Cut strips on both sides of the white strip that are bigger than the last strips and add that to the stack.
Add black strips to each side of the white sheet.
Stand the cane stack on the end like you see it and cut through the center of all of the sheets.
Here is another view.
Add a sheet of white to the center of the cut on one side. The sheet will be rolled out on the 3rd thickest setting.
Put the stack back together with the white sheet in the middle...
Stay tuned for part 2.