This is the 3rd installment of the shinning star cane.
You can find part a here
http://mariesegal.blogspot.com/2011/05/african-trade-beads-part-12-shinning.html
You can find part b here
http://mariesegal.blogspot.com/2011/05/african-trade-beads-part-12-shinning_18.html
You will need:
Clay Machine
Clay slicing blade-SB
Red Cernit
Yellow Cernit
Blue Cernit
Opaque White Cernit
Green Cernit
Porcelain White Cernit
Ruler if you need it
Middle cutter in the Makin's clay Star set M36006
Knitting needle 3 to 4mm
All links above lead to my husband's on-line store the www.clayfactory.net
Thank you so much for looking.
This is the picture and the instructions from the last part b http://mariesegal.blogspot.com/2011/05/african-trade-beads-part-12-shinning_18.html
Trim off the excess, if there is any.
Take the conditioned blue clay and roll it out in your clay machine on the thickest setting.
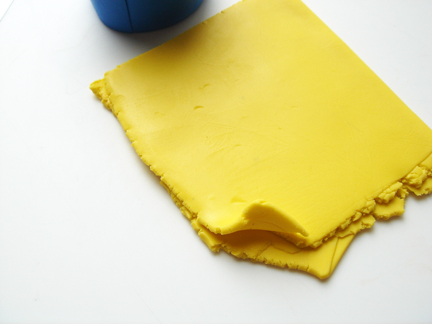
Trim the leading edge of the sheet for a straight edge. Lie the cane on top of that edge.
Trim the side to match the size of the cane length.
Roll up the cane in the sheet and then roll the leading edge over on top of the sheet on the other side of the cane and gently make a mark on that sheet.
Cut with the clay slicing blade just inside of the mark that you have made. Roll the cane up in that sheet. the edges should meet up.
You do not have to smooth and mess with the seam more than pressing the edges together.
Roll out some of the conditioned yellow and fold the sheet in half to double the thickness.
Do the same thing with some of the conditioned red clay.
Cut the yellow sheet to the width of the cane center and then use the yellow sheet to measure the red one.
I added more of the porcelain to the green here. I used the same mixed that I used in this cane here
http://mariesegal.blogspot.com/2011/04/african-trade-beads-part-11.html
Double the green clay as you did with the red and the yellow and then cut to the same size as the yellow and red sheets.
Trim the end to the other sheets.
Trim the sides to match those edges.
The piece that you see trimmed off is the folds of all the sheets. I did this so I have a straight edge.
I then made my first cut which is about 3/16" in thickness.
Cut down and drag the blade forward with the clay piece against the blade and on it.
Use the slice to measure the width of the next slice and then drag the blade forward again and stick the next slice to it. Measure and cut again. Do this for about four slices or more if you can
;-O
It is not required though, you can add one section at a time. ;-D
Lay the slices in the repeating pattern against the cane center. Wrap around cane.
If this is what you end up with match the bottom edges of the slices together and then...
Turn the cane on its side and press the two matching slices in to place.
Press a little waist in to the cane by squeezing with the your thumb and forefinger and then turn a little and squeezing again.
Turn the cane and press moving upward in a circle a little press at a time.
See the center of the end of the cane moving out, this is right.
You can squeeze like this too, turning and squeezing to the end of the cane.
Turn the cane over and start in the middle again and work your way out to the other end of the cane.
When you have reduced it this way to half of the diameter it was, roll on the surface of the table of work surface.
If the cane looks rough on the outside like this you have probably done a good job and the inside will be nice and straight.
When you roll the cane you will start in the center of the coil and roll with both hands all the way to the tip of your fingers and then all of the way back past the palm of your hand in one smooth move while moving your hands away from each other.
Remember to move slowly and to make sure the cane rotates over 180 degrees when you roll. Do not make short movements it will not make a smooth coil, it will put in little dents from your fingers. The movement is smooth and fluid.
Roll down to about 3/4" and roll the blade and the cane forward at the same time to cut in the center.
You can refer back to the other canes in this series to see how that is and the description that comes with them.
Tah Dah!!! Stars.
Showing posts with label Shinning star cane. Show all posts
Sunday, May 22, 2011
Wednesday, May 18, 2011
African Trade beads-part 12 Shinning Star part b
This is continued from Part one here:
http://mariesegal.blogspot.com/2011/05/african-trade-beads-part-12-shinning.html
You will need:
Clay Machine
clay slicing blade-SB
Red Cernit
Yellow Cernit
Blue Cernit
Opaque White Cernit
Green Cernit
Porcelain White Cernit
Ruler if you need it
Middle cutter in the Makin's clay Star set M36006
Knitting needle 3 to 4mm
All links above lead to my husband's on-line store the http://www.clayfactory.net/
Thank you so much for looking.
Mix all of the colors and the opaque white with equal amount of the porcelain white.
Last picture from the last part
I go back and cradling the star in my palm I pinch the points on the star again to sharpen them up.
Roll out a sheet of the conditioned red that is long about 5"x at least 2 1/2" wide.
Trim for straight edges on three sides.
Roll out a coil that is about 3/8" in diameter and the width of the sheet.
Lay the coil along the bottom edge of the sheet.
Roll up the sheet and the coil together to form a large coil of clay.
Trim off the rough edge and roll the whole thing up.
Roll the cane down until at least half or more fit in one of the dips between the points of the star. Measure it to the height of the stacked stars and cut one. I trim off one end of the red log so it will stand straight next to the star stack.
Cut two more of those coils.
Press with your finger and thumb of one hand down and out on the coil and then using the clay slicing blade cut the coil in half.
Do that with the other two coils too!
Like this.
Make the coil into a triangle piece by pressing with your thumb and forefinger on top of the coil half, press straight down with your finger and thumb pressed together.
It will look like this. Do that with the other pieces, you will only need 5 total.
Place the point of the coil into the dip between the point of the stars. Place one in each dip.
Stand the star up so you do not smash the points of the star.
Trim off the excess length from the top of the triangle half coils.
Place all of the coils before worrying about how they fit yet!
Place the last one in and trim off the excess from the top.
Note* I cradle this in my other hand while press the two edges of the half triangle coils together.
I do a little at a time on all of them and then turn the cane from end to end and so it again all the way around.
I am only showing it on the work surface because I take the pictures by myself.
Press your thumb towards your forefinger.
Here is what the star stack will look like after you have packed it.
Don't worry if it doesn't look perfect from the end. There is some distortion by pressing the clay and the ends will look funny but may not be funny inside.
Condition and roll out a sheet of the opaque white. Trim the side to the star stack and the edge before the star stack.
Now trim the other side to match the star stack.
Roll the cane up in the sheet of white and roll the leading cut edge over the sheet on the opposite end to make a mark. You do not have to press hard just enough to make a mark with the cut edge.
With your clay slicing blade cut just inside the mark you made with the opposite edge of clay.
Roll the cane up in the sheet and the edges should meet very nicely.
Trim off the excess, if there is any.
Stay tuned for part 3...
Subscribe to:
Posts (Atom)


